
Listen to this article:
 |
Machine Learning (ML) is a subset of Artificial Intelligence (AI) that helps software perform tasks without explicit programming through a variety of statistical techniques, including deep learning (neural networks) that are inspired by theories about how the brain processes information.
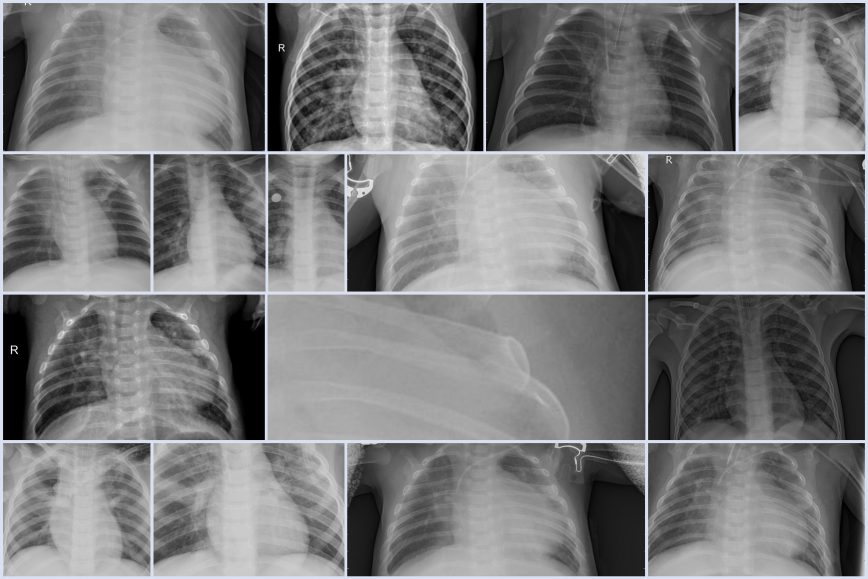
With Google AutoML Vision, functional (non-technical) developers can train machine learning models to classify images according to defined labels. In this experiment, we’re going to build a machine learning model to diagnose pneumonia from chest x-ray images of pediatric patients from Guangzhou Women and Children’s Medical Center, Guangzhou.
There are three ways to build a model with AutoML:
- Train models with labeled images.
- Leverage a human labeling service for datasets with unlabeled images.
- Register trained models for serving through the AutoML API.
For custom modelling, developers can use Google Cloud Vision, however that service does not have a Web UI and will require experience with using APIs and GCP’s SDK. I’ll describe an extension to this experiment with Cloud Vision in a future post.
Create a New GCP Project
In your GCP Console, go to the Manage resources page and select or create a new project.

Make sure that billing is enabled for your project by following these instructions. New GCP members are eligible for at least $300 in free credits, and 1 hour of AutoML training is free.
Now visit the AutoML Vision UI and follow the instructions on the page. It will guide you through Google Cloud Shell commands to enable the AutoML APIs and create a Google Cloud Storage bucket. Typical commands will resemble the following:
PROJECT=$(gcloud config get-value project)
gcloud projects add-iam-policy-binding $PROJECT \
   --member="user:<var>your-userid@your-domain</var>" \
   --role="roles/automl.admin"
gcloud projects add-iam-policy-binding $PROJECT \
   --member="serviceAccount:custom-vision@appspot.gserviceaccount.com" \
   --role="roles/ml.admin"
gcloud projects add-iam-policy-binding $PROJECT \
   --member="serviceAccount:custom-vision@appspot.gserviceaccount.com" \
   --role="roles/storage.admin"
Create a Dataset
Download the training pneumonia x-rays from here to your computer. In the AutoML Vision UI, create a new dataset with the Add Dataset button.

Give your dataset a name, remember that Dataset names must start with a letter, and contain only letters, numbers and underscores. No spaces. We used pneumonia_dataset. Select Upload images from your computer and browse to the train.zip file.

Leave Enable multi-label classification deselected. Click create dataset.
Train the Dataset
In the AutoML Vision UI, click the Train tab to begin training the machine learning model. Feel free to use the default Model Name and select a training budget of 1 compute hour. While increasing the compute hours would improve accuracy and incur usage costs, our pneumonia model will be relatively accurate without it at an average precision of 99.7%.

Evaluate the Model
The Evaluate tab provides some interesting insight into the success of our machine learning model. With 1 compute hour, we can expect a precision of about 97%.

My favourite visualization is the model confusion matrix. It shows how often the model classified each label correctly, and which labels were most often confused for that label:

Clicking on the Confusion Matrix will show you images that were identified as true positives, false negatives, and false positives.
Test the Model
Click the Predict tab to test your model with new x-ray images. Download the test.zip file here and extract it to any folder in your PC. Select any test image and upload it by clicking Upload Images. Then watch as your newly trained model accurately diagnoses x-ray images for pneumonia!
Here are some examples:


If you prefer, you can use python to feed test images to your pneumonia model. Create a file called predict.py with the following code:
import sys

from google.cloud import automl_v1beta1
from google.cloud.automl_v1beta1.proto import service_pb2


def get_prediction(content, project_id, model_id):
  prediction_client = automl_v1beta1.PredictionServiceClient()

  name = 'projects/{}/locations/us-central1/models/{}'.format(project_id, model_id)
  payload = {'image': {'image_bytes': content }}
  params = {}
  request = prediction_client.predict(name, payload, params)
  return request  # waits till request is returned

if __name__ == '__main__':
  file_path = sys.argv[1]
  project_id = sys.argv[2]
  model_id = sys.argv[3]

  with open(file_path, 'rb') as ff:
    content = ff.read()

  print get_prediction(content, project_id,  model_id)
Execute the request with:
python predict.py YOUR_LOCAL_IMAGE_FILE YOUR_PROJECT_NAME YOUR_MODEL_NAMEAnd that’s it. We collected x-ray images of pediatric patients with and without pneumonia and developed a machine learning model to diagnose the respiratory infection. Imagine what we could do if we applied this technology to breast cancer detection and more!
A huge kudos to researchers at the University of California San Diego for the Chest X-Ray images. You can find the original dataset here.
Geoffrey Momin is an Engineer and Technology Consultant. He is actively researching the application of blockchain, artificial intelligence and conversational interfaces to improve human capital and enterprise management.